Adding a Gettable Item
Intro
This tutorial describes, step by step, how to add a new gettable item to ClubCrawler.
Table of Contents
- Add a location for the item in Tiled and set tiled properties
- Add the image file and add it to the sprite map in the preload function
- Write the item Class
- Add the item to the Gettables map in Item pickup
Add a location for the item in Tiled and set tiled properties
Open Tiled, a free and open source map editor that is highly compatible with Phaser and used for this game.
Open blueworld.tmx in ./Tiled Map Editor Files
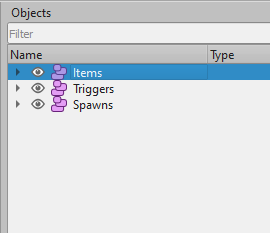
Select the item layer.
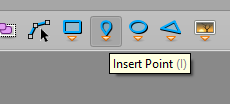
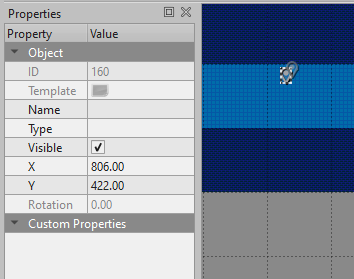
Add a point object somewhere in the map where you want the item to appear.
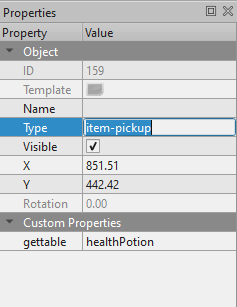
You must set the type property of the point to item-pickup.
You must also add a custom property called gettable to the object. This is a name for your object which you will later map to your class, explained later in this guide.
remember the name you define in 'gettable'! It will be used later.
Great! Now we just need to export the map to a .json file which ClubCrawler will parse.
Export it as blueworld.json in static/maps/


Add the image file and add it to the sprite map in the preload function
Drop the item image file in ./static/images.
Phaser takes image files and maps them to strings during its preload phase. Preloading for ClubCrawler currently happens in the function preloadBlueWorldAssets in utility/load.js.
In this function, add your image mapping with a unique name. The path should not include "static".
utility/load.js
function preloadBlueWorldAssets(scene) {
//...
    scene.load.image('potion', 'images/bluePotion61x54.png')
//...
}
Note: This is not associated with the name defined in 'gettable' in the TiledMapEditor. It can be the same as that one or different.
Write the item Class
The item Class must have these two properties to work: itemType and inventorySprite. ItemType should be "stackable". inventorySprite can be the same image you mapped earlier in the preloadBlueworldAssets function or a different image to show in the inventory, depending on what you want.
The class is actually called a couple times. When the player touches the item on the map, the class is instanced once to get all of its properties.
Then, when a player clicks the item in their inventory after picking it up, the class is instanced again, but with an additional property, 'player', which is, of course, the instance of ClubCrawler.Objects.Player
The player property can be used to access other objects if needed.
So all of the core logic for what the item does is done in the constructor function!
This is a little unusual, but that's just how the program evolved and will stay until it gets refactored.
So the constructor function should check its config object for the property player to determine if it's being put in inventory or used.
objects/items/healthpotion.js
class HealthPotion {

    constructor(config) {
        this.inventorySprite = "blue-potion"
        this.itemType = "stackable"
        if("player" in config) {
            config.player.heal(50)
        }
    }
}

module.exports = HealthPotion
Make sure to include the module.exports for your class.
Add the item to the Gettables map in Item pickup
The item now needs to be added to the "gettable" map in ItemPickup to map the string to the class. Add a key to GETTABLES that is the same as the string provided to gettable in the Tiled Map Editor. Assign that key to an object with three properties; "makes", "type" and "sprite".
"makes" should link to the Class you defined. (Not an instance, the Class itself)
"type" should be "stackable" or "weapon".
"sprite" should be the sprite name you defined in preloadBlueworldAssets()
objects/items/itempickup.js
const HealthPotion = require('../items/healthpotion');

//...

const GETTABLES = {
//...
    healthPotion: {
        makes: HealthPotion,
        type: "stackable",
        sprite: "potion" // this is the sprite name given in step 1
    }
//...
}
The key here must be the same as the string provided to gettable in the TiledMapEditor.
You're done
That's it! Start up club crawler by typing npm run start and test out your item!